SnowPack, React & TailWindCSS How to setup and get going....
Its a bit long...and thats after editing lol

Hey bud bud, I hope I find you well. Today I am going to share with you a very cool and capable toolchain that would really blow your left sock off your right foot.
Like the clickbaity title says, for our toolchain we would be working with three really cool tools that would help us develop ideas and build awesome kick-ass sites. These are:
- SnowPack - is a "...lightning-fast frontend build tool, designed for the modern web".
- React - The most indemand UI Framework that is about.
- Tailwindcss - a fresh and awesome utillity first css style library.
The Background
Let me introduce all three through the means of a really awful hyperbole. In this small break from reality both me and you are the developers or architechs for building a mordern day building, it could be a shop for someone that you need to build or an art gallery for an aspiring photographer or a house for someones blogs and wants to share personal interests. What ever the job requirements of the day is you as the architech is responsible for:
- Planning and Design of the building
- Working with tradesmen and other professionals to collate the nessecery skills and expertise
- Implementing best practices
- Battle testing the designs
- Lay the foundations
- Move from Architect to Project Manager and start working with your team to build to the robustly tested plans.
- ...at some point in the future you find yourself on an episode of Grand Designs drinking tea with Kevin McCloud.
- Build a building something pretty substantial and delivers to what your customer wanted.
- Tweak, snag and prefect till you can do no more.
- Most importantly it has to provide residual value and a return on their investment over time.
In reality for us web developers we are architects for our clients digital buildings. We are the gatekeepers if you like to allow them to get their business digitally ready. Like Architects we have the ability to build grand sites from a barren enviroment, for us we have a similar methodology when it comes to the way we go about building our digital buildings.
When we start, like our kindred spirits, we are faced with a conundrum: there is so many ways for you to build a house, yet there is really just a handfull of right ways to do it.
That is where the toolchain comes in. Now I am not sitting here, professing that these three tools that comprise of this particluar toolchain is the be-all-and-end-all of all the toolling out there. It is not. Its not even meant to be for a comparrision between one and its competitors, for they all serve their own application and purpose very well.
It is really a guide of sorts to help someone get up and going with these three tools in particular.
When it comes to Build tools, there are already a few big boys on the yard. These 'contractors' are the likes of Webpack, Parcel, Rollup . They do their job like builders, and like builders no two are the same, however they are consumit professionals to their trade and can do a thorough job, if you know how to get the best out of them. But, some have strange 'behavioural' problems, others have random quirks and they all come with their own unique blend of weird idiosyncrasies.
Worst of all you have to work on their terms. I mean have you ever tried to work with a group of tradesmen 40+ years on the job and say, "erm guys I dont think...." personally, I wasnt so brass, but my friend was, he's never been seen since. Thats what it can feel like when it comes to working with some of the big build tools.
But Snowpack is different, in a few respects, one obvious difference is that it is fricken quick. Only requires about 7 or 8 dependencies. The team behind it are some really talented folk who see the web in a slightly more minimalism sort of way. They utilize ES6 modules, and they way they compile the file output using 'esbuild' is just exquisite.
It is relatively straight forward as the rest of them, but it is new and the documentation needs added to forsho but it is definiately worth trying out. There is alot of cool things that come with Snowpack and I strongly urge you to check them out.
Next up on the repertoire of trusted-traders is React, if you want it to fit into the anology above, React are the do all carpenters of the Web world. If React had a first name it would be Joesph.
Once the foundations are set (the build process) its time to get the walls up and make it watertight. That is pretty much React/Preact/Vue/Svetle/Whatever is out tomorrow...They all come with 'friends' to 'help' get the job done, in the sense of addons and extentions written by the wider community.
It is imperitive that you can get React to work ontop of your foundations with little to no-problems...else your going to have a very badly built and unsafe structure. Something that will be more costly to you and your clients in the long run.
Lastly comes TailwindCSS, the flamboyant sometimes abrasive interior designer. Tailwind is like the Laurence Llewelyn-Bowen of the CSS world. Why do you need a CSS 'utility framework' I hear you ask, well like Laurence would say, "my dear, you need to get out more".
Truth is, this framework really has caught my attention. Im not personally great at the CSS stuff, I spend more time than I am comfortable with to get styles right and working. This excellent approch to styling is (once you get the hang of the naming and a few other things) is straightforward, efficent and a real timesaver and is "so art nouveau, its delightful darling".
So now you have some background as to why we are building this toolchain with these three guys: The minalist, speedy gonzalez builder, to the 'we-do-it-all' carpenters, to the ultra-hipster-what's-cooler-than-cool-Andre 3000, interior designers. Between these three tools you have the ability to create some of the best looking web-buildings on the tinderweb.
Before we go off and start assembling the three stooges together and letting loose, you need to have some prerequistie background knowledge in using the Command Line (CLI), installing stuff with npm, you dont need to be fluent in React but enough to get going, and a semi/partial/kinda-of-sorts understanding of Node.
Lets get Building
Firstly let me share my enviroment, Im using Ubuntu via $wsl on windows 10. Running VS Code with the following dependencies: "node v 15.6.0, npm v7.5.4, yarn v1.22.10". I like Yarn, pnpm also has its many benefits but I can work easier with Yarn, more so than npm.(personal taste you can also use npm for this, its entirely up to you)
Life for the most part would exist in the command line. Sorry bud, but I promise I will make it easy for you, with screenshots and full commands that you can just copy and paste and even a video at the bottom. I would recommend that you type these in a couple of times for muscle memory sake.
Also before we do begin have the documentation open and ready, you are going to need them incase you get stuck.
Snow is fun to play with
Since this is a React based project, we are going to be using the SnowPack Documentation for React. Here it gives you a brief guide, and I do hope in the future we see more verbose documentation from the team, but those guys are busy atm, nonetheless this is sufficent to get up and going with React in Snowpack.
To get started, make sure you are comfortable, and have a freshly brewed cup of sweet nectar beside you. Stretch and cue the music....
First up, we install Snowpack using their 'bare-bones' startup template; lol 'bare-bones' is double speak for sod all, in snowpacking terms its enough to get going. I mean when you go treking over moutains you take a light sleigh, right?... To install we type into the CLI
npx create-snowpack-app snowy-react-app --template @snowpack/app-template-minimal
Breaking this down, the npx is nodes package manager. Next is the package that we are installing create-snowpack-app this pulls in the mindblowing 8 dependencies from the package repos and installs it into a folder that we called snowy-react-app. Next up is a few commands that we are instructing the setup to follow, first is that it is to follow our 'bare-bones' template --template @snowpack/app-template-minimal after this you can set as default which package manager we wish to use for the project --use-yarn or --use-pnpm but we would be using npm for this exercise.
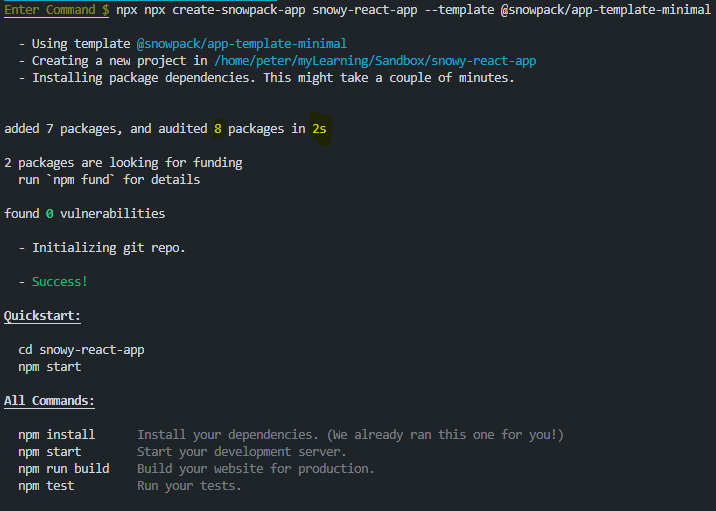
By the time you have read that it, everything should of installed correctly. This is one of the most notable things of Snowpack comparable to other bundlers. I genuinely think it is one of the few things faster than Usain Bolt. Now we wish to head into our newly created snow-react-app directory
cd snow-react-app
Before we get tempted to hit the run server command on npm, lets get a quick look over a few things.
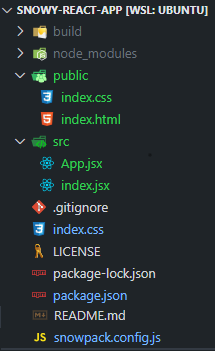
After install this is how the folder should look.

The two most important files so far are the package.json and the snowpack.config.js file. We will leave the build and node_modules folder well alone. Next we have our index html, css and js files.
I personally would recommend that you get your folder structure setup, make this similar if not identical to the way react sets out their files. To do this we will move them about using the command line.
📁 root: Where the config files are stored, try not to over pollute this space
       |-> snowpack.config.js
       |-> package.json
       |->index.css - Input CSS File in the root for Tailwindcss.

📁 root/src: All Your React components and their assets (JSX,CSS, Images)
       |-> index.jsx - root entry point
       |-> App.jsx
       |->App.css-example
       |-> .....

📁root/public: All the Global assets like images, fonts, icons, global CSS-(tbh once this is set we wont be interfereing to much in here)
       |-> index.html - root html entry point
       |-> styles.css - Output CSS file
To make these files we will type the following in:
mkdir src; --Make Directory 'src'
mkdir public;
mv index.js src/index.jsx; --Move file from the root to 'src/'
mv index.html public/index.html;
touch public/index.css; -- Creates a new file in the Public dir
This is how it should look at the end of all that,
Now you must be itching to see it, but we need to fix a few broken links to make it all connect with each other. Based on the following image from the Snowpack documentation, we can see the way it build the site it takes the './src/' folder and directs it as './dist/' for the './public/' this becomes the sites root.

So in our ./public/index.html we need to repoint a few assets to the right place, else you know: Error...
<link rel="stylesheet" type="text/css" href="/index.css" />
<body>
    <h1>Welcome to Snowpack!</h1>
    <div id="root"></div>
- <script type="module" src="/index.js"></script>   ---change this to:
+ <script type="module" src="/dist/index.js"></script>
  </body>
Now we need to tell Snowpack this change to the file structure, so far we have just implemented without telling the builders. To inform the grafters that we have made the smallest yet fundemental change we need open the snowpack.config.js file. This file is like the way we communitcate with snowpack, from here those busybodies go about doing their work. You should see something like this, and if you check the console you should see a funny wee message:
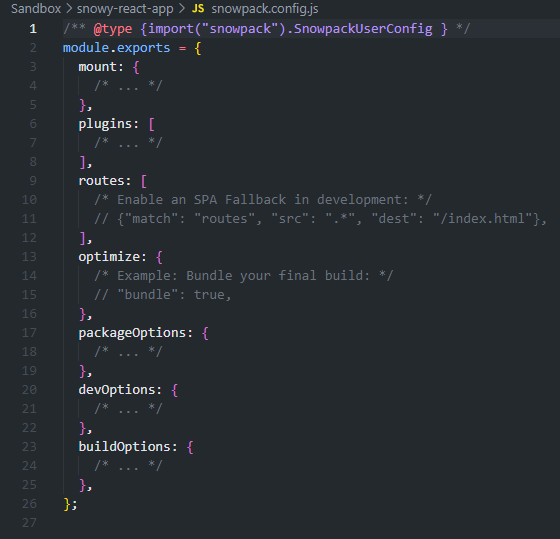
For now we only need to pay attention to the 'Mount' object in this file. Here we are going to inform snowpack of our file structure, and how to mount them to the server, and eventually build them(that is outside the scope of this article). To do this we add the following three lines to the object.
mount : {
/*...*/
//Directory Name: 'Build Directory'
public: '/',
src:'/dist',
}
Now you can go ahead and start the server by typing in npm run start. Note the time it takes to start up the server. This is the first out of the few magic tricks Snowpack presents us with.
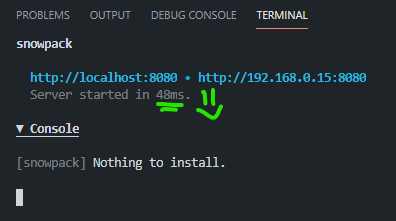
If you come across a red [404] error about the stylesheet, just ignore it for the time being, we will get round to that when we are working with the interior designers. Now you should also see in your browser a window like this:

Magic trick number two: Snowpack comes with built in support from a whole host of files for JavaScript, TypScript, JSX, CSS, Images etc, you can find out more here: Snowpack Supported Files.
In context, you might notice that our JavaScript file is actually a JSX file, but we havent even installed react yet, so how does it know...Thats the trick and I'm not one to spoil the illusion,
Now that the server is up and running, and the foundations looks like they are being laid quite nicely, we can call in those crafty carpenters.
Making Snow React
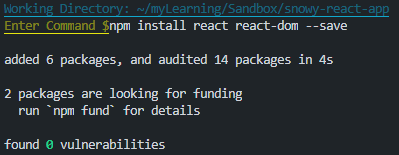
Now we need to install React; this is actually quite simple, in our new friend the Command Line(CLI) we enter:
npm install react react-dom --save
This instructs npm to download and install the React and ReactDOM files from the registry office and saves them as 'core' dependencies to the package.json.
In the index.jsx file we need to make a root in for the carpenters to get working, here we will ammend the file to act as a shell for our React App.
/* Add JavaScript code here! */
import React from 'react';
import ReactDOM from 'react-dom';
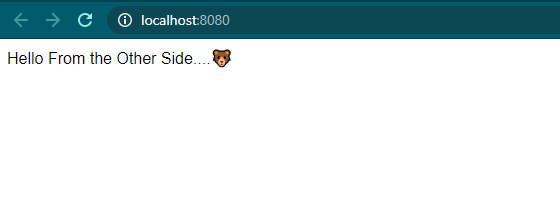
ReactDOM.render(<div>"Hello From the Other Side...🐻"</div>, document.getElementById('root'));
Within the public/index.html we just need to add way in for the App.
  <body>
   +<div id="root"></div>
    <script type="module" src="/index.js"></script>
  </body>
This should give you something along the lines of this:
Now we need to make the actual `src/App.jsx' file - at this point that easy...
touch src/App.jsx
Within the file we are going to add the folllowing code block. Now I am unashamedly going to pinch this from the Snowpacks own page: *yonk,
import React, { useState, useEffect } from 'react';

function App() {
  // Create the count state.
  const [count, setCount] = useState(0);
  // Update the count (+1 every second).
  useEffect(() => {
    const timer = setTimeout(() => setCount(count + 1), 1000);
    return () => clearTimeout(timer);
  }, [count, setCount]);
  // Return the App component.
  return (
    <div className="App">
      <header className="App-header">
        <p>
          Page has been open for <code>{count}</code> seconds.
        </p>
      </header>
    </div>
  );
}

export default App;
Now we need to just jump back to the index.jsx and change out the welcome msg to this:
  import React from 'react';
  import ReactDOM from 'react-dom';
 +import App from './App.jsx';
 ReactDOM.render(
+   <React.StrictMode>
+       <App />
+   </React.StrictMode>,
   document.getElementById('root'),
 );
You might of noticed that as we are going about editing and saving these files, snowpack has quietly been keeping up, heck you should even notice that when you added the react packages it went ahead and installed those dependencies, and quickly aswell. This is Magic Trick number 3...Now you should have a page that looks like this:

We all good so far?
Now the next few steps are to make snowpack which by now if you havent realised is a fricken rocket, even faster, cause you know, I want warp speed.
Snowpack has Fast Refresh and Hot Module Reload as additional superpowers, but you need to coax them from the builders. I mean no builder likes to work twice as fast and three times harder. Thats where Snowpack is different, they just dont mind.
To get them to really move we add this following snippet into the bottom of thesrc/index.jsx
 ReactDOM.render(
    <React.StrictMode>
      <App />
    </React.StrictMode>,
    document.getElementById('root'),
  );
 + // Hot Module Replacement (HMR) - Remove this snippet to remove HMR.
 + // Learn more: https://www.snowpack.dev/concepts/hot-module-replacement
 + if (import.meta.hot) {
 +  import.meta.hot.accept();
 + }
Now when we make or save any changes to the App.jsx or any component in the future, it would instantly, I mean instantly refresh on the screen. But that is not enough, Hot Module Reload is also availble in other builders and I've still got one sock on the wrong foot....what you got Snowpack?
How about 'Fast Refresh' which preserves the component state across changes and updates automatically? Best seen with the counter problem, change some text and hit save when it refreshs the page, the counter starts back at 0....instead we want the counter to you know, keep on ticking.
To get this turned on, we need to play with Snowpack some more, you know show them that they are appreciated...In the CLI we type:
npm install @snowpack/plugin-react-refresh --save-dev
Once that is complete, in the snowpack.config.js file we need to add this plugin to inform them that the game is up and we know they can work faster....
  module.exports = {
    mount: {
      public: '/',
      src: '/dist',
    },
   plugins: [
+         '@snowpack/plugin-react-refresh'
    ],
  };
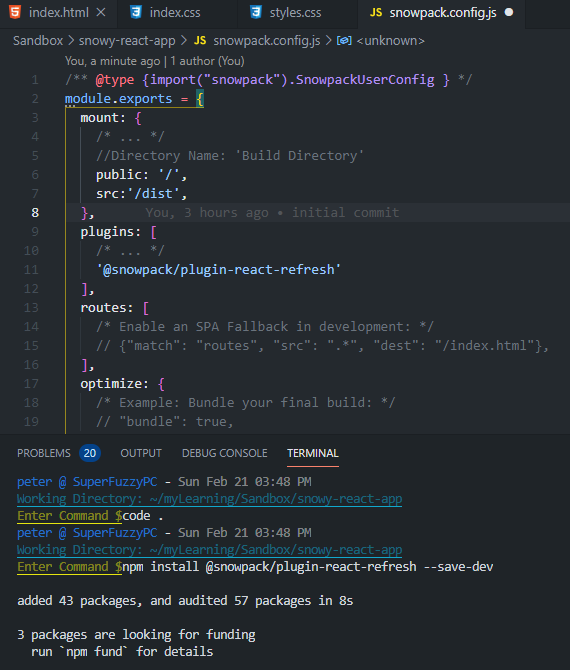
Now restart the server, (do this whenever you make changes to the configuration of the server for them to take effect), and you should see the crazy speed that you can edit files with and have them displayed, keeping state between refreshes adds a whole level to the developer experience. Because as much as I find hitting F5 very refreshing, it can get tedious.
-Magic Tricks no 4 & 5: Lady and Gentle Bears both my socks are now blown off...great job Snowpack =)
Did someone call in the Decorators already? !!!
Now lets finish this up with getting TailwindCSS up and running, that way we can let the troops be and just enjoy implementing those awesome designs and plans that you have.
I have experimented a bit with this next step and I think this is by far the 'easiest' or at least the most replicatable way of getting Tailwindcss to work.
If you could navigate to Snowpack's Tailwaind CSS Documentation you will see three different ways for you to interact Tailwind into your project. There is pro's and con's with each, with this way, you are aware of the other methods.
The first is using native CSS using the css @import statement. This is a straight forward way of getting tailwinds in to the project. However, this imports a heavy 3+MB of CSS styles that you, me will never need.
One of Tailwindcss's key selling points is it's ability to 'tree-shake' which is as it sounds, it takes that huge 3.5MB before build, scans what you have used and what styles you need as a result and only ports them over in the final build. So it goes from really big, to ridiculously small file size.
For anyone serious about keeping their interior designer happy know the benefits of putting up with their neuroticism is that you end up with an absolute stunner of a house. In this case the LLB of CSS strongly recommend using PostCSS. Which mean we will aswell.
I will explain a bit about the PostCSS before we go, the most critical thing to think of it as a post-css compiler, that takes our fancy mordern css that we write either as css, sass, or even JS-as-CSS and outputs a modified file that has all of our styles in there and some extra stuff like autoprefixer for giving you cross browser support etc. at build time. Meaning all of our styles, css and sass gets found and then ran through our compiler and gives us a stylesheet that we can put out into our build-public/index.css.
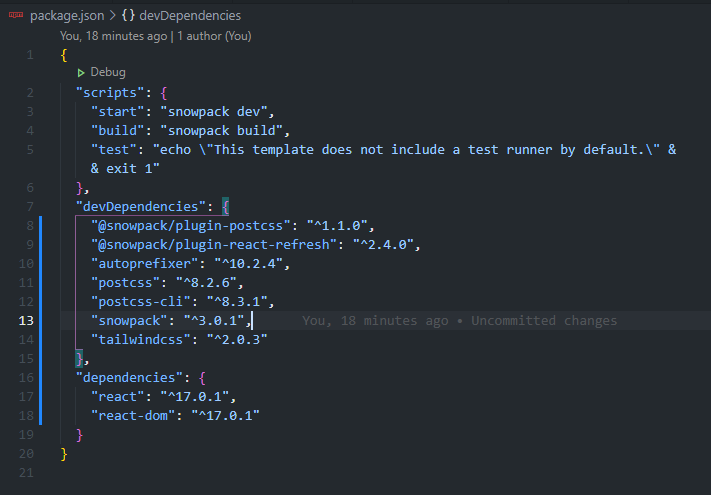
To install all the necessery PostCSS dependencies, autoprefixer and also Tailwindcss, that we are going to need for this next part, which we will save them to the developer enviroment.
npm install @snowpack/plugin-postcss@latest postcss@latest postcss-cli@latest autoprefixer@latest tailwindcss@latest --save-dev
So our Package.json should look something like this:
Now we add this to our snowpack.config.js to tell the builders about someone coming in to help them with handling the CSS stuff for the project:
module.exports = {
  mount: {
    /* ... */
    //Directory Name: 'Build Directory'
    public: '/',
    src:'/dist',
  },
  plugins: [
    /* ... */
    '@snowpack/plugin-react-refresh',
   + "@snowpack/plugin-postcss"
  ],
....
Next we need to create a .postcss.config.js to provide the instruction to our new plugin to work properly.
touch .postcss.config.js
/* .postcss.config.js */

module.exports = {
  plugins: [
      require('tailwindcss'),
      require('autoprefixer')
    ],
};
Now PostCSS will run on all the files css files in our entire project. Its almost time to let the decorators loose.
This point we leave the Snowpack Documentation and head over to see what Tailwindcss wants us to do...Tailwindcss Installation with PostCSS
Next up on our configuration journey is initializing a tailwind.config file in our root directory, to sit alongside the rest of them. We do this by entering in the CLI:
npx tailwindcss init
This should then give us something that looks like this:
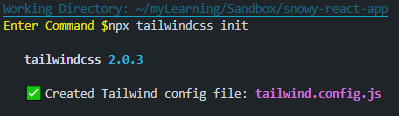
This give us another 'bare-bones' cough config file. As you go on your tailwind journey you will slowly build on this config file. Like with the snowpack config file this instructs the interior designers better with more precise requirements for the creative ideas in the the project. Here we are going to be adding some instruction to its treeshaking rule known as purge
/*(tailwind.config.js*/
  module.exports = {
    purge: [
  +    './src/**/*.{js,jsx,ts,tsx}',
  +    './public/index.html'
    ],
    darkMode: false, // or 'media' or 'class'
    theme: {
      extend: {},
    },
    variants: {},
    plugins: [],
  }
Now remember that 404 error in your stylesheet, well that is there because we havent added any styles into it. So Snowpack really goes wtf and kicks up a very small fuss.
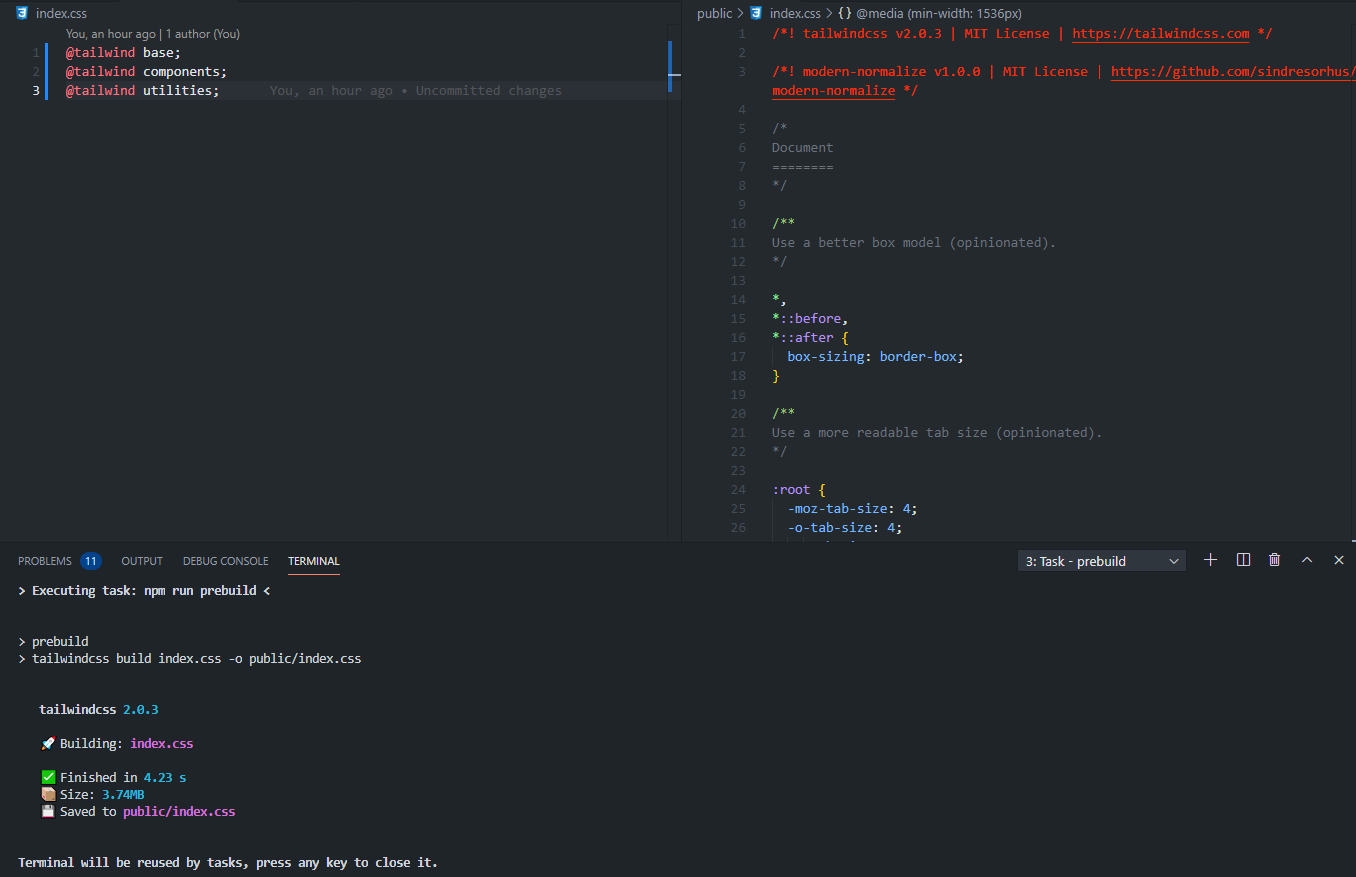
In our ./index.css we add the following three lines to instruct our css that we are going to be using tailwind.
.index.css

/* Tailwindcss imports */

@tailwind base;
@tailwind components;
@tailwind utilities;
VS Code has some really awesome extentions that are built by tailwindcss to help the developer experience as they call it. This is what I have installed and next to it you will notice three lines in the settings.json. This is there because the linter will kick up a fuss about these foreign @tailwind import statements in the css file.
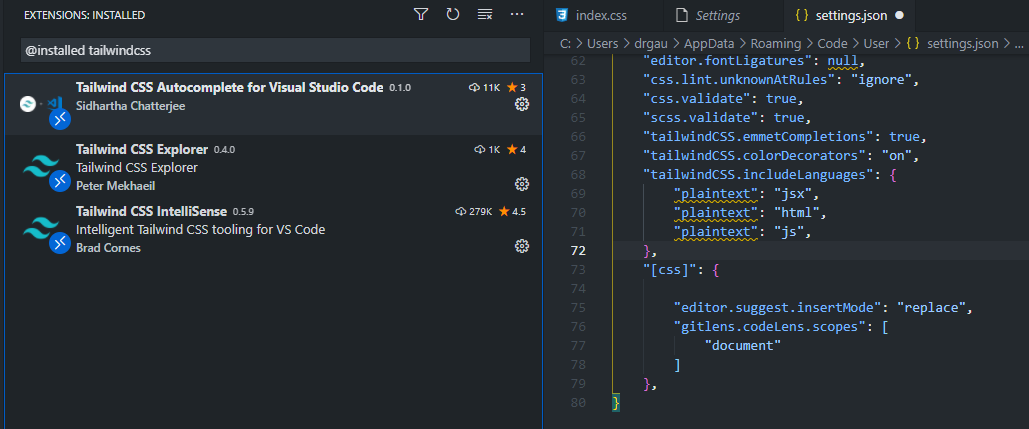
The best way I have found to get it to behave it by going into your settings.json and adding a those couple of extra rules shown in the image into the settings.json. To do this hitctrl + , scroll to the bottom lets you see the css in json, that gets you to where you enter the plaintext values.
Now I have found that by running this next command get everything setup from the tailwindcss side of things, from a prebuild step we can add this into npm scripts by writting in the package.json:
/*package.json*/
  "scripts": {
    "start": "snowpack dev",
    + "prebuild":"tailwindcss build .index.css -o public/index.css",
    "build": "snowpack build",
    "test": "echo \"This template does not include a test runner by default.\" && exit 1"
  },
Now all we need to do is run the prebuild script in the terminal:
npm run prebuild
And you should see something like:
Now, let's do VS Code a favour here and close it down whilst you go have another cup of funky juju, and ponder wtf you just went through. I say this because the Tailwindcss extentions are a bit fiddly when it comes to realising that they are meant to be working.
Restarting the IDE helps wake it up so to speak. Why, what is the benefit of this, why let me demonstrate... (there is no audio with this video.)
Dont go making Yellow Snow now.
yeh, just dont. Snowpack and well no-one really would appreciate it much. If you do get stuck there is a good developer community that you can find surrounding all three of the tools mentioned, on twitter, discord and stackoverflow. There is a plethora of really fantastic videos on youtube that lets you learn more about them aswell.
If you got any questions or need a hand, or even if you notice a mistake in here, just reach out. You can find me on here or over at twitter@aFuzzyBear.
Now go build those great digital towers for your clients, you the mordern day architect with your team of elite tradesmen behind you. There is nothing you cant acomplish.
Thank you for following along, you are just awesome.


